Gluten Free Chocolate Chip Cookies

Last year for Passover, I bought all these unusual flours that were kosher for Passover for the first time. I bought banana flour, quinoa flour and coconut flour.

I made a few things with them, with mixed reviews.

The consensus seems to be that the end results were no better than the traditional alternative “flours” like potato starch, tapioca starch, ground nuts and matzah meal.

Tonight is the holiday of Purim.  What this also means is that Passover is around the corner.

I still have so much leftover flours from last year. I couldn’t let them go to waste.

This holiday provides a unique opportunity to be creative. I thought: “why not bake cookies with the gluten-free flours from Passover to give away for my Mishloach Manot (Food to Friends.)??

Voila! Chocolate Chips Cookies with banana flour.

For a wonderful and funny explanation of Purim, please go read what Dolly wrote over at koolkosherkitchen.  Raizel and I really enjoyed it. Check it out!


Gluten Free Chocolate Chip Cookies

Ingredients:

1 ½  cups banana flour
2 cups rolled oats

Passover adaption: omit and add nuts, if desired.
1 ½  cup brown sugar
½  cup white sugar
1 cup oil
2 large egg
1 teaspoon baking soda
1 teaspoon salt
2 tsp pure vanilla extract

9 oz. chocolate chips


Instructions

Food processor: mix oil, sugars, eggs, and vanilla. Add banana flour, oatmeal, baking soda, and salt until just blended. Stir in the chocolate chips. (If you want, you can stir in the oatmeal with the chocolate chips, but I did not).

Drop or shape dough using a teaspoon onto cookie sheet lined with parchment paper.

Bake in 350*F oven for 15-20 minutes, or until lightly browned.

Cool slightly while still on the cookie sheet and then let cool completely on wire racks.

I must have been tired by the time I made these. Unfortunately, I only have one picture of the final product:

Raizel thought that they were really good. My husband unfortunately thought that they tasted “passadik” (like Passover food.) I say, “that’s the way the cookie crumbles.”

Today, there are more and more people who are gluten free. I think that these cookies are a great way to accommodate people on such a special diet.

Enjoy!

Happy Purim 🎭

Onion Kugelettes

Onion Kugelettes

I am continuing to explore creative ways to use up leftover bread. This recipe is another adaption of my challah kugel. Somehow, once I start something, I keep pursuing it until I master the concept.

The beauty of this recipe is in its simplicity: it has minimal ingredients, and also very little sugar. Somehow, when it’s not too sweet, it feels healthier.

I really like my mother’s suggestion to bake them as cupcakes. Cupcakes cook more quickly, require less fuss when eating and improve portion control. Plus, with cupcake liners, it’s easier to clean up the pan afterwards as well. It’s a win-win for everyone.

This recipe is also very accomodating. Since I am time challenged, I find it helpful to prepare the kugel in the morning and then bake it once I get home from work in the evening.

Ingredients:

16 oz. challah

Variations:  I have not tried it yet, but, try substituting crushed matzah or rice instead of bread.

3 cups water

3 onions (or more) diced, about 2 cups

3 eggs

4 tablespoons oil

½ teaspoon salt, or to taste

1 teaspoon garlic powder, or to taste

½ – 1 teaspoon onion powder, or to taste

½ teaspoon pepper, or to taste

Optional: 1 teaspoon to 1 tablespoon sugar, to taste

Optional: 2 tablespoons of poppy seeds

Please note: The amount of spices depends on the bread. Since challah is relatively sweet, less sugar is required.

Instructions:

Preheat oven to 350* F.

Saute onions until caramelized. Crumble or break up challah (or matzah or rice) into small pieces into bowl.

Combine water and pour over challah. Mix until challah is soft, but not too mushy. Add remaining ingredients and mix well.

Pour into cupcake pans lined with cupcake holders. Bake for approximately 1 hour or until done.

Serve warm or at room temperature.

Sauteing the onions.

Adding the cubed bread.

This time I added poppy seeds.

mixing the bread, onions and water.

Ready to be put in the oven.

Fresh and hot right out of the oven!


Even though it has onions, and they are not very sweet, Yaffa and Raizel have been known to  eat them for breakfast too! Simple and good!

Enjoy!

Homemade DIY Bean Butter

Homemade DIY Bean Butter

The rise in nut and seed allergies in children has necessitated some old-fashioned culinary ingenuity on my part.

Up until recently, Yaffa’s favorite lunch was humus with almost anything or a peanut butter sandwich.

However, due to today’s severe nut and seed allergies, humus and/or peanut butter are no longer an option.

I needed to learn how to adjust and adapt: What could I make that is healthy, all natural, nut-free, seed-free, vegan and also suitable for a pack-n-go lunch??

My friend Malka suggested trying soy butter instead of peanut butter. That suggestion was quickly vetoed. No one liked the taste or the consistency of commercial soy butter.

In addition, I prefer to limit our soy consumption.  Soy is ubiquitous in so many products today. I worry that eating too much of anything, even if it is supposedly healthy, is ultimately unhealthy.

Malka’s suggestion, however, got my creative juices flowing. I thought: “If it is possible to make soy butter, why wouldn’t it also be possible to make something similar with different beans instead?”

Eureka! It worked!

The formula of 1 ½ cups roasted beans: 2 tablespoons of oil: 1 cup of water works with all sorts of beans. I have made this with black-eyed peas, kidney beans and white beans. Our current favorite is chickpeas.

The trick is to make the beans more “nut-like” by roasting them and then adding oil.

To save time, I make a large amount at one time and then freeze it in smaller amounts. This way I only need to defrost as needed. One batch can last for quite a while.

I also stagger each step in the process. One night, I make the beans in the crockpot. The next day, I roast the beans in the oven. Up to a few days later, when I have the time, I mix everything all together. By chunking each task, it feels less time consuming.

Homemade Bean Butter

Ingredients:

1 1/2 cups cooked and then roasted beans

2 tablespoons oil

2 tablespoons sugar (to taste)

1 cup water

1/2 teaspoon salt, to taste

Optional: Cocoa powder, cinnamon and vanilla

Directions:

Cook beans and then roast in 425*F oven. I add a bit of oil, so that they will get slightly crispy.

Soak roasted beans with water and oil until soft and most of the liquid is absorbed.

Pulse in food processor or an immersion blender until smooth, adding more liquid if necessary.

Add sugar, salt, cocoa powder, cinnamon and vanilla to taste. Process until smooth.

Here are the step by step pictures:


img_1744

Chickpeas after they were roasted

My new way of keeping track of what I cook. Make a picture!


img_1804

Soaking the beans until the water is absorbed.

img_1805

Pureeing with an immersion blender.

Pureeing until smooth

Final product. Adjust the amount of liquid until desired consistency.

I find that a little bit of sugar makes the spread more palatable. Malka suggests making a more savory version using salt, herbs and spices.

For people who need to avoid nuts and seeds, this is a healthy, yummy alternative.

Try it, you’ll like it!

Enjoy!

Apple or Fruit Crisp

This apple crisp was made in honor of the patients in one of my groups, in particular Walter.

For weeks we processed in the group their disappointment over not having a holiday party funded by the hospital for them.

Something that seems so trivial, kicked up all their stuff about not feeling worthy, validated and cared about.

We spent weeks talking about “what makes you feel cared about?” Who do you give gifts to, and who gives gifts to you?”

Finally, after much effort and discussion, the patients agreed to hold a pot-luck party.

I tried to help behind the scenes by calling all the patients and reminding them about the party and keeping track of who was bringing what.

I must say that the patients completely redeemed themselves. I am so proud of them!

Everyone brought something and a few people who haven’t been to the group in such a long time actually heard from word of mouth from others in the group and showed up too.

I often find my patients very inspiring. I marvel at their strength of character despite their adversities and their comfort expressing simple acts of faith, gratitude and prayer.

Before eating, all the patients took off their hats while another patient, Davis, led the group with a prayer. The blessing that Davis shared was so beautiful, I wish I could have recorded it! In all my years, I have never witnessed such respect and cohesiveness.

During the party, patients enjoyed a casual conversation, which focused around:

  1. What are you grateful for?
  2. What are your best wishes for the group?
  3. What are your goals for the New Year?


Patients enjoyed the party and they were very grateful that everyone was so generous with each other and for the opportunity to give and receive from each other. It was truly a heartwarming!

APPLE or FRUIT CRISP

Ingredients

Filling

5-6 cups fruit, cubed (I used 3 cups apples and 2 cups cranberries)

1/2 cup sugar

Optional: 1 teaspoon vanilla extract

Optional: 1 teaspoon cinnamon

Optional: 1- 11/2 tablespoons cornstarch or 2 teaspoons of tapioca

Optional: 1 tablespoon lemon juice

Optional: 1/4 teaspoon nutmeg or allspice

Topping

1 1/2 cups oatmeal

Optional: substitute 1/2 cup flour instead of oatmeal

1/2 cup brown sugar

1/4 cup oil

Optional: 1 teaspoon cinnamon

Optional: 1/8 teaspoon salt

Optional: 2 tablespoons sliced or slivered almonds

Instructions

Preheat oven to 350*.

Combine fruit and filling ingredients in a greased or parchment paper lined baking dish

Combine the ingredients for the topping and mix until blended.

Sprinkle over fruit

Bake until fruit is soft and topping is slightly browned.

If topping becomes over cooked, cover loosely with aluminum foil.

Cool before serving.

Placed fruit in pan.

Ingredients for the filling.

Mix until well blended.

Ready to go in the oven.

Voila! Fresh out of the oven!


Here is a picture from the party:

I am happy to say that the fruit crisp was almost completely eaten! Even Walter said that he liked it.

Enjoy!


Happy New Year!

Hi Everyone!

I thought I would take a few moments to wish everyone a happy new year!


Just for fun, I thought I would share this funny picture that my friend Lisa sent me.


Finally, one friend sent me this. I liked it so much that I made a picture for it.

Have fun and enjoy!


With blessings,

Carol (with help from Raizel who was my style consultant)

Cranberry Challah Kugelettes & True Giving

What would Walter Think? Cranberry Challah Kugelettes


I like to think that Walter would be flattered if he knew how much he inspired me by his off the cuff comment.

Interestingly, the other group members were also very amused by his comment. It seems as though it sparked a lot of discussion!

The group this past week was continuing to feel disappointed that there was no funding for a holiday party this year.

In order to address their disappointment, I initially suggested that we have a potluck party.  I received a lukewarm response.

So, then, we had a discussion on giving and receiving gifts. I asked them: “who do you give to?” And, “who gives to you?”

As the group members discussed the questions, they began to realize that true happiness comes from giving and sharing rather than getting or taking.

When we give to give, we feel love for others and loved by them. When we give to get, it is a recipe for resentment and disappointment.

Still, one group member asked: “But, what if you don’t have very much?”

I suggested that even if a group practices “musical giving” it creates more good will than if everyone just keeps for themselves whatever they have.

“Musical giving” is my term to describe when everyone keeps passing around even the same gift from one person to another. It is almost like the game “the wonder ball,” hence the name.

It might not make sense, but, the act of giving, even if it is not consumed and then subsequently passed onto someone else, creates a relationship and promotes spiritual growth and connection.

I am happy to say that by the end of the group, everyone agreed to have a potluck holiday party.

Hopefully, everyone will remember to bring what they committed to bring in.


Cranberry Challah Kugelettes

In the meantime, I am continuing to explore creative ways to use up leftover bread. This recipe is another adaption of my challah kugel.

At my mother’s suggestion, I decided to make them as cupcakes, so that they would be easier to handle and cook faster.

Ingredients:

16 oz. challah

Variations:  I have not tried it yet, but, try substituting crushed matzah or rice instead of bread.

1 ½ cups water

1 ½ cups milk (I used rice milk)

Optional: use orange juice for either or all of the liquid instead

1-1 ½ cups cranberries

6 eggs

1 cup sugar: I used brown sugar only this time

2 teaspoons vanilla

2 teaspoons cinnamon

1 teaspoon allspice

½ teaspoon salt

4 tablespoons oil

Optional: orange zest

Optional: icing sugar sprinkled on top after it’s baked.

Instructions:

Preheat oven to 375* F.

Crumble or break up challah (or matzah or rice) into small pieces into bowl.

Combine water (or juice) and milk and pour over challah. Mix until challah is soft, but not too mushy. Add remaining ingredients and mix well.

Pour into cupcake pans lined with cupcake holders. Bake for approximately 1 hour or until done.

The texture is particularly creamy when it is baked in a deeper pan containing about 1 inch of water.

When I do not used a hot water bath, I bake it in a 350* F oven instead. It depends on how time challenged I am at that moment.

Serve warm or at room temperature and dust, if desired with icing (confectioners’) sugar. I did not, but I think it might be prettier with it.

This time, I put everything in the bowl and mixed the ingredients together.

Mix well.

Bake in muffin tins so they are easier to eat. No utensils required.

Fresh out of the oven.

The girls LOVED them!

Final product.

I am happy to say that it was a big hit!  Enjoy!

Now, I have to see if it meets Walter’s approval.

Related image

Merry Christmas! 🎄

This picture was taken at the church near my sister’s house.

Today during a group with my patients, one patient, Angel, said that on Christmas, they eat a birthday cake that says, “Happy Birthday Jesus.” I thought that was such a touching gesture of faith.

For those who celebrate, enjoy your special day!

Semi-Off Topic: DIY Detox Bath Salts

DIY Detox Bath Salts

For obvious reasons, giving gifts on Christmas is not something that comes naturally to me.

Although Chanukah and Christmas both occur around the same time of year, they are each unique holidays with their own rituals, aesthetic beauty and spiritual relevance.

Growing up, we did receive and give presents during Hanukkah, but it was never in mass quantities that people seem to receive today.

Chanukkah card that I made this year with Yaffa’s art.

Consequently, this time of year is sometimes a struggle for me.

I do want to express my appreciation and gratitude to the people who help me, and create cheerfulness and comradery with the people I work with. But, I do not want to succumb to the conspicuous consumption and rampant materialism that I often see going on around me.

My solution is to create DIY gifts which are both personal and practical.

This year, I felt inspired to make DIY Detox Bath Salts.

It is surprisingly fast, easy, all natural and even relatively economical to make. The trick is to make a nice presentation to doll it up.

In the back of my mind, I wanted to give the bath salts in a urine cups and specimen bag and label this DIY Detox (not U-tox) Bath Salts. When I told the other nurses I work with about it, we all laughed.

This is the gift presentation that I did not make:


However, I decided to play it safe and give the bath salts in a small mason jar with a nice label and a colorful ribbon.

Ingredients

2 parts salt: Epsom salt, Himalayan salt, Magnesium Chloride, Dead Sea Salt

½ part baking soda

Optional: ¼ part bentonite clay

Optional: ¼ – ½ part finely ground oatmeal.

Note: I would categorize the bentonite clay and oatmeal with the baking soda. Otherwise, it might not dissolve as well.

Optional: 20-30 drops essential oils of your choice.  I used lavender, which is my favorite!

Optional: food or soap coloring. I did not use any coloring.

Optional: Cinnamon, ginger or tumeric could also be used to give it some colour and additional therapeutic properties, but, I am not sure if they would dissolve properly. Then, you might have to wash out the tub, which is something that I do not find relaxing.

Instructions:

In a large bowl, mix to combine the salts and baking soda. Add essential oils and stir until well-blended.

The appearance of the Bath Salts can be changed by adding a few drops of food coloring to the salt mixture until you reach the desired shade you would like.

If anyone would like to make their own natural food dyes, here is a great link.

This recipe can be easily scaled up, which I did to make lots of gifts for everyone.

It is not very colourful, but here is the picture of the bath salts in the large jar I used to mix up everything in.

Without dye, the only colour came from the Himalayan salt.

I also added Silica Gel Packs to prevent the salts from sticking together. It really helped!

Here are the various ways I tried to present the gifts so that they seemed festive and personalized:

Overall, the gifts were very well received. Even the men I work with wanted some despite the fact that it smelled like lavender.  Next time, to make it more unisex, I might use patchouli oil.

I got very creative and below are various samples of labels one can use:


Happy Holidays everyone!


Chocolate Challah Kugel

I’m back!

The picture of the adorable cat above, is the latest addition to our family.

At the end of this post, I will share more about him.

Stay tuned!

I have missed blogging, but, for some reason, I uncharacteristically found myself with nothing to say for the past year.

I hope that I have found my voice again, and this is a new beginning!

Part of my inspiration to renew this blog was an off the cuff comment by one of my patients.

During one of my groups at work this week, “Walter,” said, “Carol doesn’t look like someone who likes to cook.”

At first, I thought his comment was completely off base, and I felt slightly offended. To me, he was making an unsubstantiated assumption.

Upon reflection, it occurred to me: perhaps “Walter” was really trying to communicate something else?

Is it possible that “Walter” was really expressing his disappointment that this year there is no funding available to have a holiday party?

Maybe what he really wanted to say was: “does Carol care enough about us that she would make us a party and do all the cooking?”

I am still thinking about the incident, as you can tell.

The upside of his comment is that it reminded me how much I really do miss blogging.

And just in case his comment could really be taken at face value, I was motivated to actually sit down and write a new post on my sorely neglected blog.

My motives might be a little immature, but, I really do have so many recipes to share on juggling special diets, special needs and time challenges!

Chocolate Challah Kugel 

This recipe is really a recent adaption of my challah kugel. I am trying to come up with creative ways to use up leftover bread.

I am happy to say that it was a big hit!

Ingredients:

16 oz. challah

1 ½ cups water

1 ½ cups chocolate chips

1 ½ cups milk (I used rice milk)

1/2 cup cocoa

6 eggs

1 cup sugar: ½ cup brown sugar and ½ cup white

2 teaspoons vanilla

½ teaspoon salt

4 tablespoons oil

Optional: icing sugar sprinkled on top after it’s baked.

Instructions:

Preheat oven to 375* F.

Crumble or break up challah into small pieces into bowl.

Add chocolate chips.

Combine water, milk, cocoa, eggs, vanilla, salt and oil and whisk until smooth and well-blended.

The sugars can be added to the bread and chocolate chips, or to the liquids. This time, I did both. The white sugar I added to the bread, and the brown sugar was added to the liquids. I think it might be better to add the sugar to the liquids so it can dissolve more easily and be more evenly distributed. This recipe is very flexible!

Pour liquid over challah and chocolate chips.

Mix until challah is soft.

Pour into a parchment lined pan and bake for approximately 1 hour or until done.

The texture is particularly creamy when it is baked in a deeper pan containing about 1 inch of water.

When I do not used a hot water bath, I bake it in a 350* F oven instead. It depends on how time challenged I am at that moment.

Serve warm or at room temperature and dust, if desired with icing (confectioners’) sugar. I did not, but I think it might be prettier with it.

Variations:  I have not tried it yet, but, I wonder if this would be good with crushed matzah instead of bread?

Alternatively it might even be made with rice too. Depending on the desired texture, it might be better to lightly blend the rice mixture with an immersion blender before adding the chocolate chips. The goal is to have the mixture slightly smooth but not mushy.

Now that I see how adaptable this recipe can be, I am hoping to explore other variations too.

Here are the pictures:

Bread, chocolate chips and white sugar.

Whisking the sugar, cocoa, eggs, liquid and vanilla

mixing wet and dry ingredients.

The last few pieces. I forgot to take a picture when it was first done.

Enjoy!

As promised, here is the story of our new cat.

Last spring we acquired an outdoor cat, Ari.

I love cats, but, my husband, unfortunately is very allergic to them. So, when we met, I sadly had to give my 2 cats away.

Over the years, I would frequently remind Jay of the tremendous sacrifice I made to marry him. My husband would always joke, “What’s better, having a husband or 2 cats?” He would then add: “Don’t answer that!”

When we first married, I used to be able to find a local stray cat to befriend and share a “Positive Cat Experience.” Over the years, however, that changed. It seems as though there were no longer any stray cats around.

So, as an act of true love, Jay suggested that perhaps I could have a cat again, with the stipulation that the cat was not allowed to come in the house.

It was a tall order, but, with the help of Google, I discovered that there is a local program by the SPCA called “Back Yard Buddies.”

Cats adopted through this program are feral cats that have been spayed/neutered, given their shots, and microchipped. They are not supposed to be indoor cats, and the SPCA gives you all the equipment one needs to train the cat that you will be his/her new feeding source.

It seemed like a win-win for everyone!

My brother was very skeptical when he heard about it. Dov said, “It sounds like taking on a charity project.” I suppose on one level it is.  But, the cat we received is the friendliest feral cat one could ever hope for.

Naturally, life is never how one expects.

Although I am the one who takes care of Ari, ironically, my husband is his chosen person. Ari greets my husband, spontaneously hops up on his lap, and otherwise in general seeks him out.

It is truly very funny.

One of my friends suggested that I sue for alienation of affection, or get another cat who will be MY cat. So far, my husband has vetoed that option.

I am truly enjoying this cat. It is so nice to have a Positive Cat Experience on a daily basis. I just had to share!

DIY Deodorants and Magnesium Oil

Basic Formula for DIY Deodorants with and Without Baking Soda

I am time challenged person who seeks to live a balanced and sane life. My passion for fast and easy all natural healthy kosher cooking also includes a passion for DIY fast, easy and all natural beauty and cleaning products too. When I go on my periodic all-natural kicks, I am only willing to use DIY beauty products if they are easy, economical and effective.

In addition to my facial scrub and hair conditioner, I also make DIY deodorant.

Super-Fast and Easy DIY Deodorant

This is the recipe that I posted earlier. I call it my “In A Pinch Solution.”
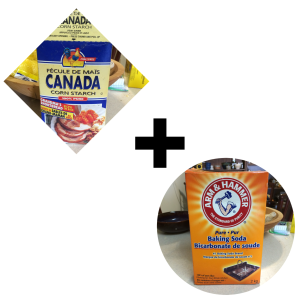
Ingredients

1 part baking soda

1 part starch: corn, potato, tapioca, etc.

Instructions 

Blend together and store in glass jar. Apply with makeup brush or sponge while still slightly damp from bathing.

img_4841

Make using equal parts of both.


Carol’s Basic DIY Deodorant Powder

When I first began using DIY deodorant, I used just plain baking soda. Unfortunately, I found it very abrasive for my skin. Over the years, I have developed this recipe which is practical, easy and works! Afterall, if it is not practical, then I can’t sweat it, if you will pardon the pun.

Ingredients 

1/2 cup baking soda

1/2 cup starch

1 or 2 tablespoons clay powder

1-3 teaspoons activated charcoal

Optional: coconut oil to right consistency (about ½ cup)

Optional: 5-10 drops of essential oil of your choice, i.e., tea tree, peppermint, lavender, sandalwood

Instructions 

Blend together and store in glass jar. Apply with makeup brush or sponge while still slightly damp from bathing.

If you prefer to apply as a cream or a stick, slowly mix coconut oil into the powder until desired consistency. Personally, I find the powder faster and lower maintenance.  However, lots of people find a cream easier to apply. So, try it both ways and decide for yourself!


I have been using this for over a year and I can honestly say that it works!

My husband jokes — “if all else fails, you can eat it too!”

After I made my regular deodorant, one of my daughter’s therapists, Lynette, told me that she always wanted to use DIY deodorant, but, she is allergic to baking soda.


I figured that she could not be the only person who reacts to baking soda, so I went on line to try and find a DIY deodorant without baking soda that meets my criteria of easy, effective and economical. I am happy to say that I have created my first batch, and it really works too!

The downside is that it is slightly less effective than the one with baking soda. I found that it only works for 12 hours. After that, I found that I needed to reapply either the powder or the spray.

These deodorants are not antiperspirants. So, you will still sweat, but, you will not smell offensive. Sweating, however, it a good thing. It helps to release toxins and is necessary for proper temperature regulation.

Carol’s First Attempt at DIY Deodorant Powder without Baking Soda

Ingredients

1/2 cup starch

1/2 cup clay powder (you can use only 1 or 2 tablespoons clay powder, if you want)

1- 2 teaspoons finely ground natural salt (I used pink Himalayan salt)

2 -3 teaspoons finely ground Epsom salt or Magnesium oil (more on this later)

Optional: 1-3 teaspoons activated charcoal

Optional: 5-10 drops of essential oil of your choice, i.e., tea tree, peppermint, lavender, sandalwood, etc. The list is up to your creativity and personal preferences.

Instructions:

Blend together and store in glass jar. Apply with makeup brush or sponge while still slightly damp from bathing.


Carol’s First Attempt at DIY Deodorant Spray without Baking Soda

Ingredients

1 tablespoon Epsom salt or Magnesium oil (more on this later)

1 tablespoon Apple Cider Vinegar

2 tablespoons Witch Hazel

2 tablespoons Vodka/alcohol spirits up to 120 proof (the higher the alcohol content, the stronger it works: 70-90 low; 90-120 medium; 120+ strong)

1/8 teaspoon (a “pinch”) natural salt (I used pink Himalayan salt)

Optional: 5-10 drops of essential oil of your choice, i.e., tea tree, peppermint, lavender, sandalwood, etc. The list is up to your creativity and personal preferences.

Instructions:

Mix together the ingredients and store in glass jar or spray bottle. Shake before using and apply using your fingers (assuming they are clean and you are not sharing the jar with anyone) or spray under arms while still slightly damp from bathing.

For some reason, I found it better to first apply the spray, and then apply the powder too. Then, in the morning, I would just apply the powder.

I am not including a picture, since it is a clear liquid.

Overall, I was very pleased with the outcome. I am going to share it with Lynette now too.

DIY Magnesium Oil


In the process of learning about no-baking soda deodorants, I learned about magnesium oil and its many health benefits. There is a ton of information available on line, so I am not going to repeat myself here.

I thought, however, that it might be helpful to include various infographics that I found on line to explain the benefits of the various ingredients. At the end of this post, I am also including various sites which include information about magnesium, and other sites to explore DIY beauty products.

Apparently, it is very difficult to get enough magnesium intracellularly through food, as the soil today is more depleted than in the past. And, one of the best ways to obtain magnesium is through the skin, or transdermally.

DIY Magnesium Oil

1/2 cup filtered water

1/2 cup magnesium chloride flakes

Basically, the ratio is 1:1 water to magnesium chloride flakes

Instructions:

Bring the water to a boil in a non-aluminum saucepan. Turn off the heat and stir in the magnesium flakes until dissolved. When cool, pour into a spray bottle or glass jar. No refrigeration is necessary.


Spray directly on the skin, and rotate the site to different parts of your body and rub lightly until it is absorbed.  Use anywhere from 10-30 sprays per day.

Results so far:

I wanted to share with everyone that using magnesium oil daily has so far changed our lives.

For over a year, Yaffa has unfortunately had a chronic staph and strep infection on her skin. She completed several rounds of antibiotics. Despite also washing her with betadine solution, nothing seemed to be helping.


So, I started to give her Epsom salt or magnesium chloride baths, and spraying magnesium oil on the lesion twice a day. It was miraculous! Her infection is finally better and starting to resolve!

Since Raizel became sick, she has been complaining of chronic fatigue.  We have gone to so many doctors and had so many blood tests. Nothing seemed to explain her symptoms. So, I started spraying magnesium oil on her twice a day too and another miracle occurred! Her fatigue is lifting, and every day she feels better and better. Raizel even notices how much better she feels. It has been quite dramatic.

Finally, I have developed psoriasis, probably due to all my stress. Despite all my efforts, nothing seemed to really help. I too have started using the magnesium oil twice a day, and no more itching! I am so happy!

So, I highly recommend using magnesium oil, assuming you are otherwise healthy. Any questions or concerns, please consult your health care provider.

References:

https://wellnessmama.com/3610/low-magnesium/

https://wellnessmama.com/22357/spray-deodorant-recipe/

https://ods.od.nih.gov/factsheets/Magnesium-HealthProfessional/

http://lpi.oregonstate.edu/mic/minerals/magnesium

http://www.umm.edu/health/medical/altmed/supplement/magnesium

These are 2 of my all-time favorite sites to explore DIY everything:

Homemade Natural DIY Deodorant – Recipes – Powder – Cream – Spray – on and on

Simple and Effective Homemade Deodorant Spray